Course Lessons
Install + Configure
Ok, now we have the knowledge of how LSPs work. How do we set up LSP integration with Neovim?
Essentially. to set up LSP integration with neovim, you're going to need 3 main packages.
Mason
Mason is a package that downloads and installs binaries for your neovim instance. We are going to use Mason to handle the installation of our LSPs. More docs located here: https://github.com/williamboman/mason.nvim.
Mason is an ESSENTIAL part of the neovim ecosystem we are creating here. We can install mason by adding the github short url to our configuration, in a new file. Lets call this file lsp-configuration.lua
return {
    "williamboman/mason.nvim",
    lazy = false,
    config = function()
      require("mason").setup()
    end,
  },
After creating this file, we can exit and re-load vim to see Mason being installed by Lazy! isn't that great?
Once mason is installed, we can initialize it by typing :Mason while in neovim. The :Mason command will open up the Mason GUI. So lets open it up and take a look around.
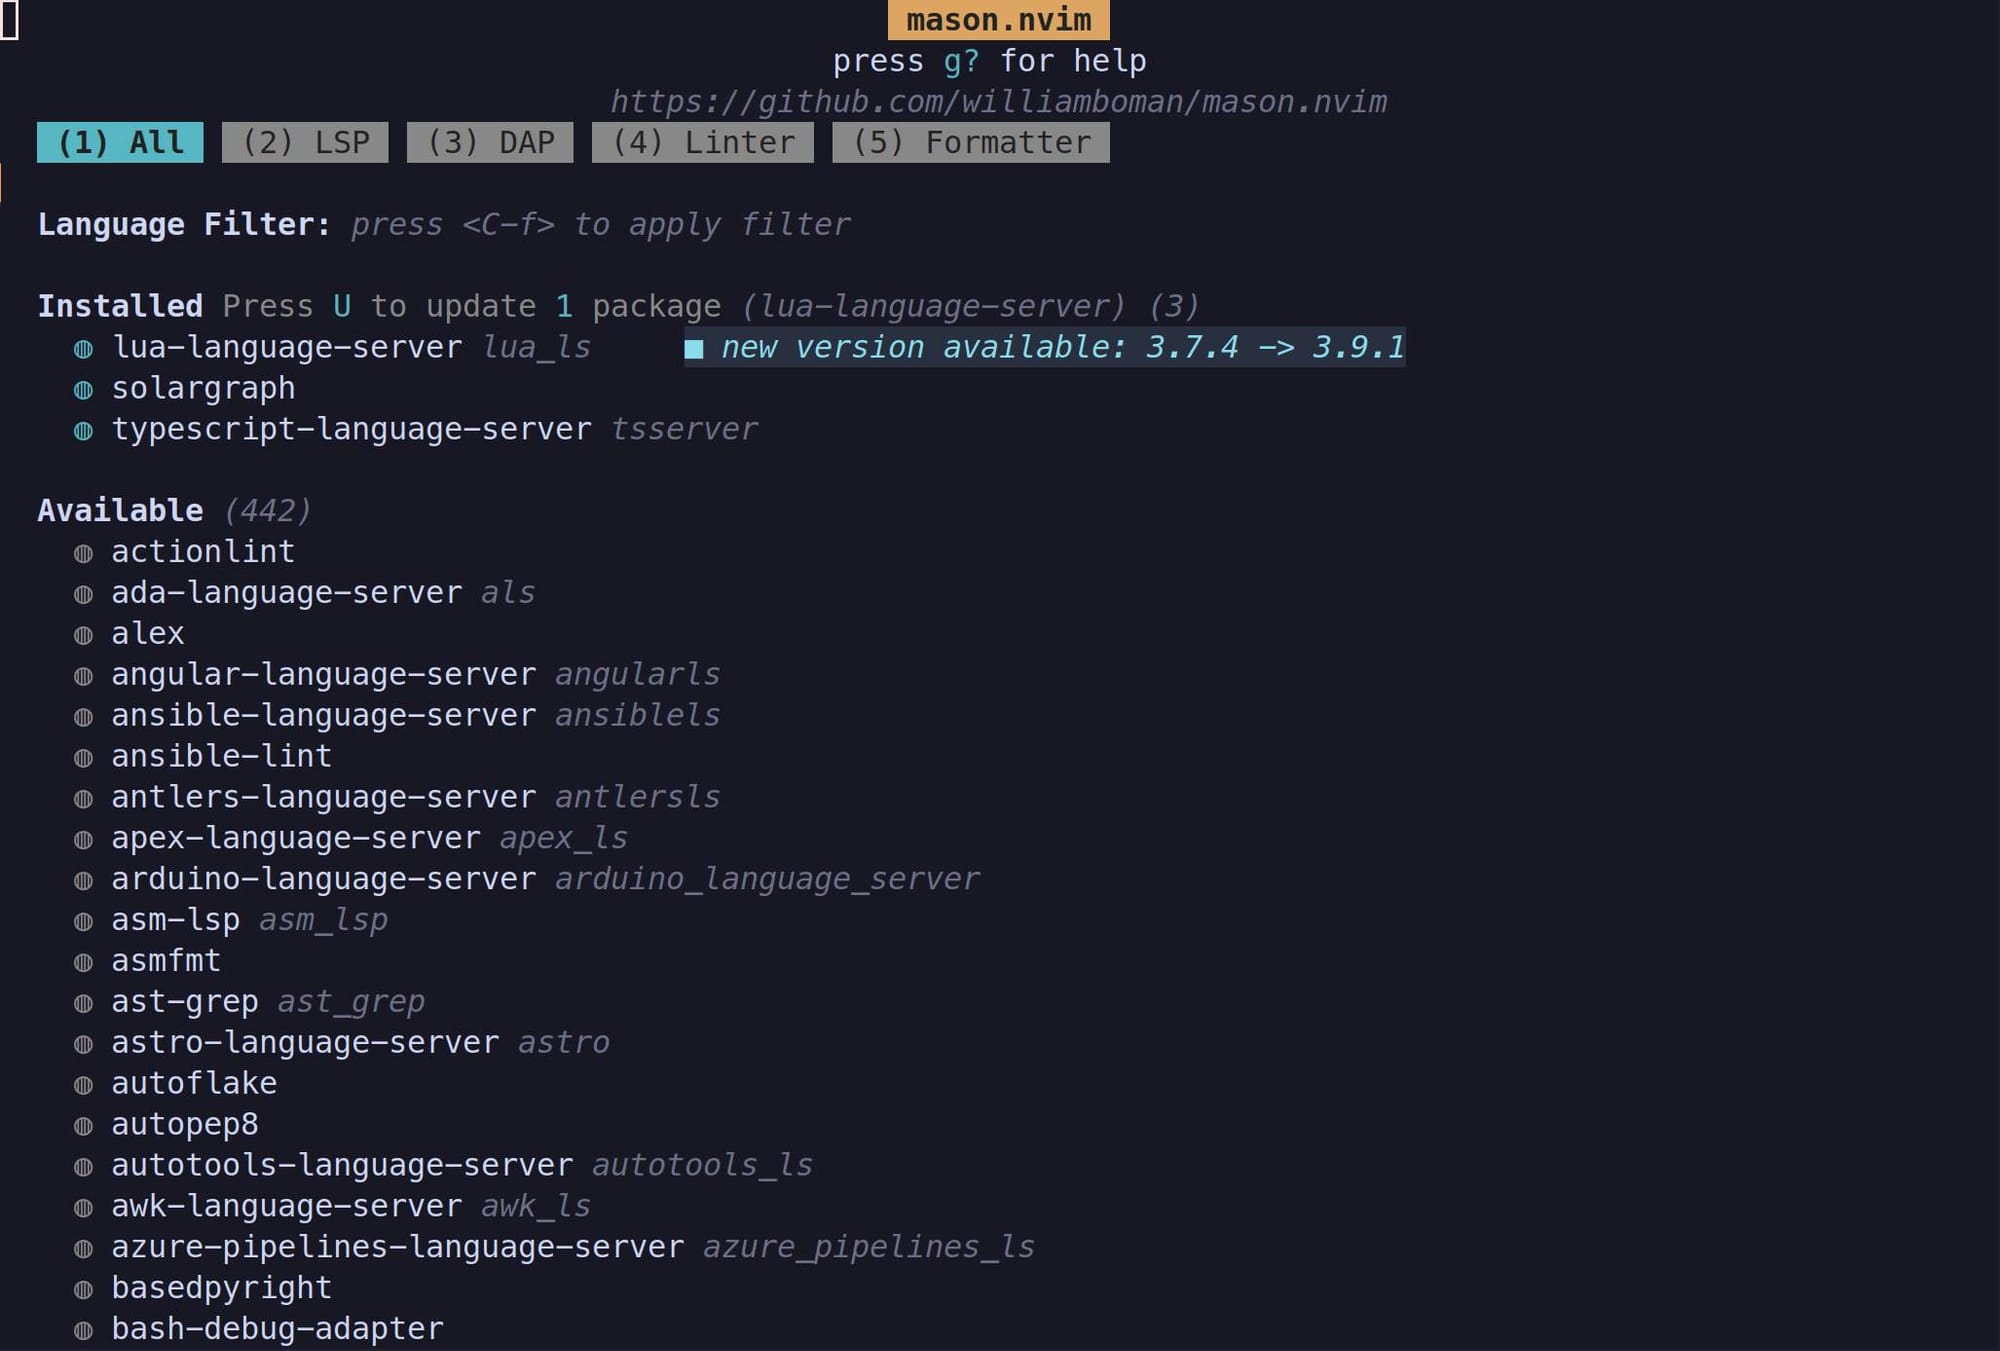
:MasonMason is a program that will install binaries onto our machine. As you can see, there are a LOT of supported binaries Mason can install. In our case, we are going to install LSPs through Mason. You can see above, pressing 2 will get us to the LSP tab of Mason. You can see that Mason supports all common LSPs like typescript-language-server, lua-language-server, and solargraph just to name a few.
Now, we don't have to quite install any programs yet. But its nice to have a look around to see what Mason offers.
Mason lsp config
mason-lsp-config is a package that will close the gap between the installed binaries from Mason, and the actual communication to neovim's LSP client. More info can be found here: https://github.com/williamboman/mason-lspconfig.nvim. This plugin also an essential piece to the LSP puzzle.
mason-lsp-config allows us to (from the docs above):
- register a setup hook with
lspconfigthat ensures servers installed withmason.nvimare set up with the necessary configuration - provide extra convenience APIs such as the
:LspInstallcommand - allow you to (i) automatically install, and (ii) automatically set up a predefined list of servers
- translate between
lspconfigserver names andmason.nvimpackage names (e.g.lua_ls <-> lua-language-server)
We can add this plugin to our lsp-config.lua file like this:
return {
  {
    "williamboman/mason.nvim",
    lazy = false,
    config = function()
      require("mason").setup()
    end,
  },
  {
    "williamboman/mason-lspconfig.nvim",
    lazy = false,
  },
}
Nvim LSP Config
nvim-lspconfig Is a package that contains configs for LSP servers and neovim. It essentially handles the communication between Neovim's LSP client and LSP servers themselves. Docs are located here: https://github.com/neovim/nvim-lspconfig.
By setting up these three plugins, we get all the functionality we need from our LSP servers! Here is a quick example of what our config looks like after installing these plugins:
return {
  {
    "williamboman/mason.nvim",
    lazy = false,
    config = function()
      require("mason").setup()
    end,
  },
  {
    "williamboman/mason-lspconfig.nvim",
    lazy = false,
    opts = {
      auto_install = true,
    },
  },
  {
    "neovim/nvim-lspconfig",
    lazy = false,
  },
}
Ok, so we're done right?
Technically no. You see, now we have all the packages we need to set up our LSP integration with neovim. Now, we have to actually install our LSPs and hook them up to neovim using this config! So let's get into that.
The first LSP we are going to hook up is lua_ls. lua_ls is a language server for the lua scripting language. This is a perfect place to start, because our config is written in lua. So its like we're dogfooding our LSP configuration by using the LSP IN OUR CONFIGURATION.
Installing lua_ls
Previous, we installed a package called mason, now we get to use mason to actually install our first language server. While inside neovim, lets open up mason with the :Mason command. Then, we want to navigate to LSP by pressing 2. Once in the LSP menu, we can search for lua_ls like you would search for anything else in neovim, by pressing /. Here is what our screen looks like:
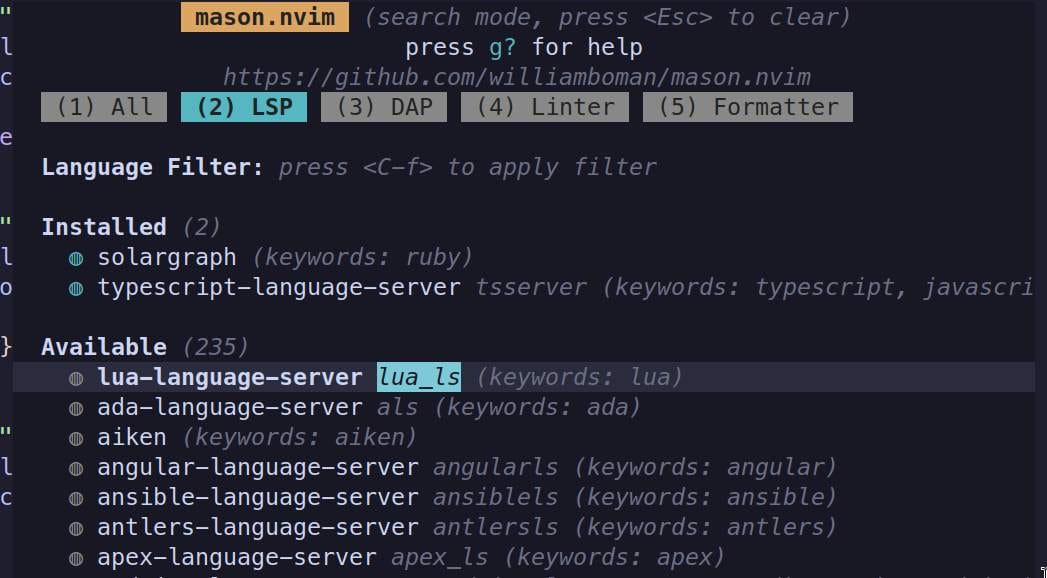
When you are hovered over lua_ls you can press esc to enter normal mode, then i to install the language server, and voila! You have lua_ls installed in your system!
Hooking up lua_ls to neovim
Now we have our lua_ls binary installed on our system. It's time to actually hook this LSP up to Neovim so we can start using those sweet sweet language server features.
We can hook up lua_ls to neovim by adding these lines to our config 👇
 {
    "neovim/nvim-lspconfig",
    lazy = false,
    config = function()
      local lspconfig = require("lspconfig")
      lspconfig.lua_ls.setup({})
    end,
}
This will tell lspconfig that we want to use lua_ls on any buffer that matches what lua_ls is looking for, essentially.
Now lets restart neovim. Then we can open up any lua file to test out our config. Lets open our lsp-config.lua that we were just working on, and type :LspInfo. It should look something like this (don't mind the none-ls part that is coming up later):
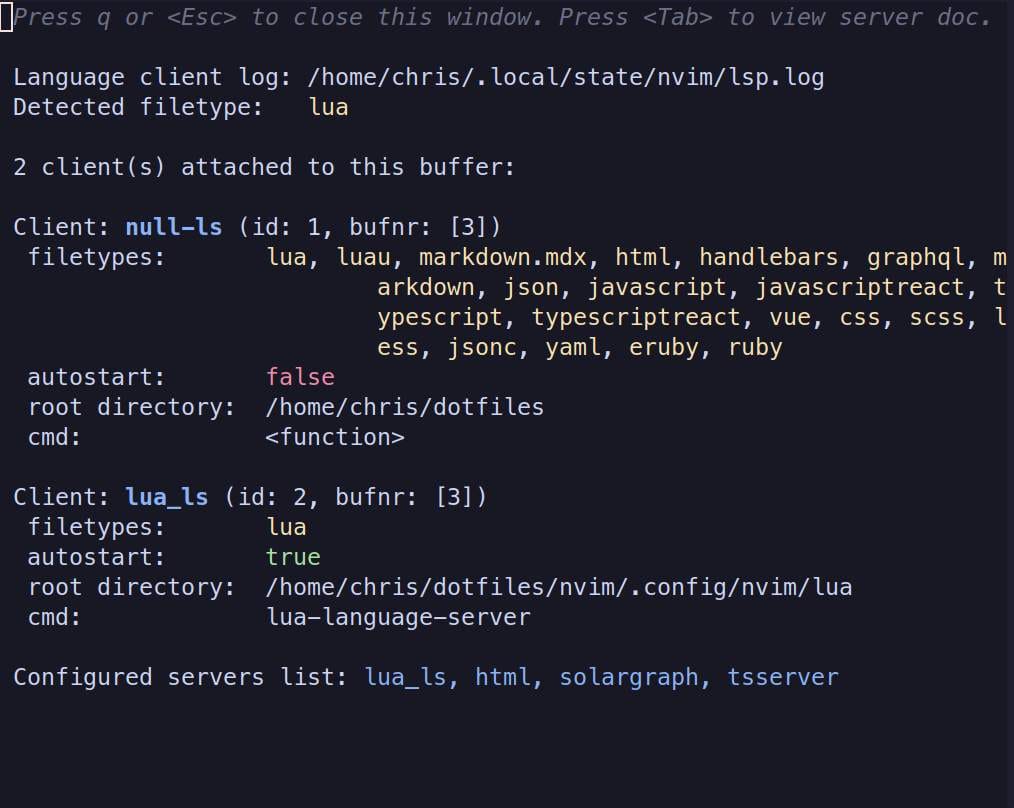
If your neovim screen looks something like this, then congrats! You have Client: lua_ls attached to this buffer!
keybindings
So now we have our LSP attached to our neovim buffers for lua, how do we use its features? Well, we can set up some keybindings of course!
neovim implements special functions for language servers that we can hook into for our LSP integration, lets set up keybindings for some of the most common ones. Add this to our nvim-lspconfig section to our lsp-config.lua file:
      vim.keymap.set("n", "K", vim.lsp.buf.hover, {})
      vim.keymap.set("n", "<leader>gd", vim.lsp.buf.definition, {})
      vim.keymap.set("n", "<leader>gr", vim.lsp.buf.references, {})
      vim.keymap.set("n", "<leader>ca", vim.lsp.buf.code_action, {})
      vim.keymap.set('n', '<space>rn', vim.lsp.buf.rename, {})
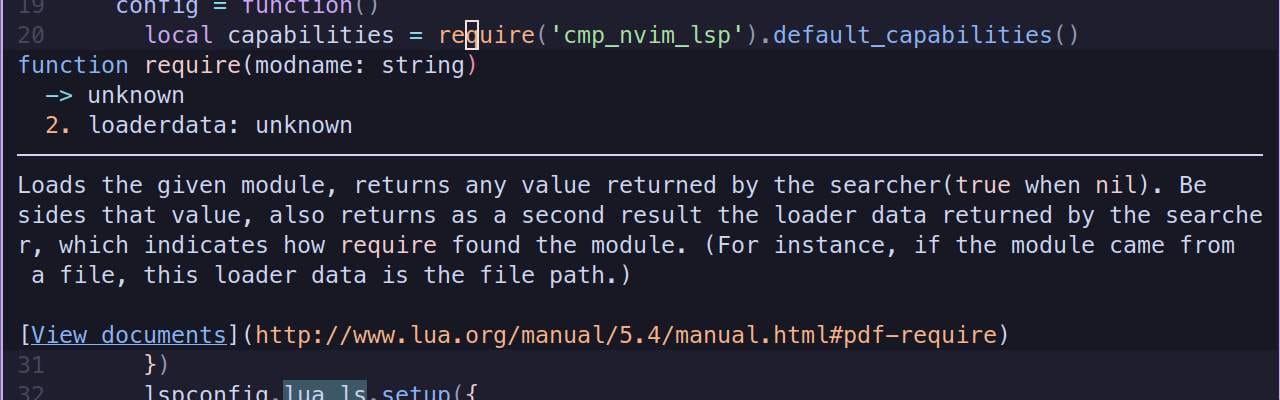
This will set up the keybindings for all the most common functions we would want to use in neovim. Go ahead and try them out! reload neovim, open up a lua file, hover over a require and type K, you should get documentation that looks like this:
Now you should be all set! you have lua_ls set up and running in neovim. Mason is installing binaries, and nvim-lspconfig is handling the communication between our LSPs and neovim! Here is our complete lsp-config.lua file:
return {
  {
    "williamboman/mason.nvim",
    lazy = false,
    config = function()
      require("mason").setup()
    end,
  },
  {
    "williamboman/mason-lspconfig.nvim",
    lazy = false,
    opts = {
      auto_install = true,
    },
  },
  {
    "neovim/nvim-lspconfig",
    lazy = false,
    config = function()
      local lspconfig = require("lspconfig")

      lspconfig.lua_ls.setup()

      vim.keymap.set("n", "K", vim.lsp.buf.hover, {})
      vim.keymap.set("n", "<leader>gd", vim.lsp.buf.definition, {})
      vim.keymap.set("n", "<leader>gr", vim.lsp.buf.references, {})
      vim.keymap.set("n", "<leader>ca", vim.lsp.buf.code_action, {})
      vim.keymap.set("n", "<leader>rn", vim.lsp.buf.code_action, {})
      vim.keymap.set('n', '<space>rn', vim.lsp.buf.rename, {})
    end,
  },
}
You've completed this lesson!
You completed this lesson less than a minute ago.